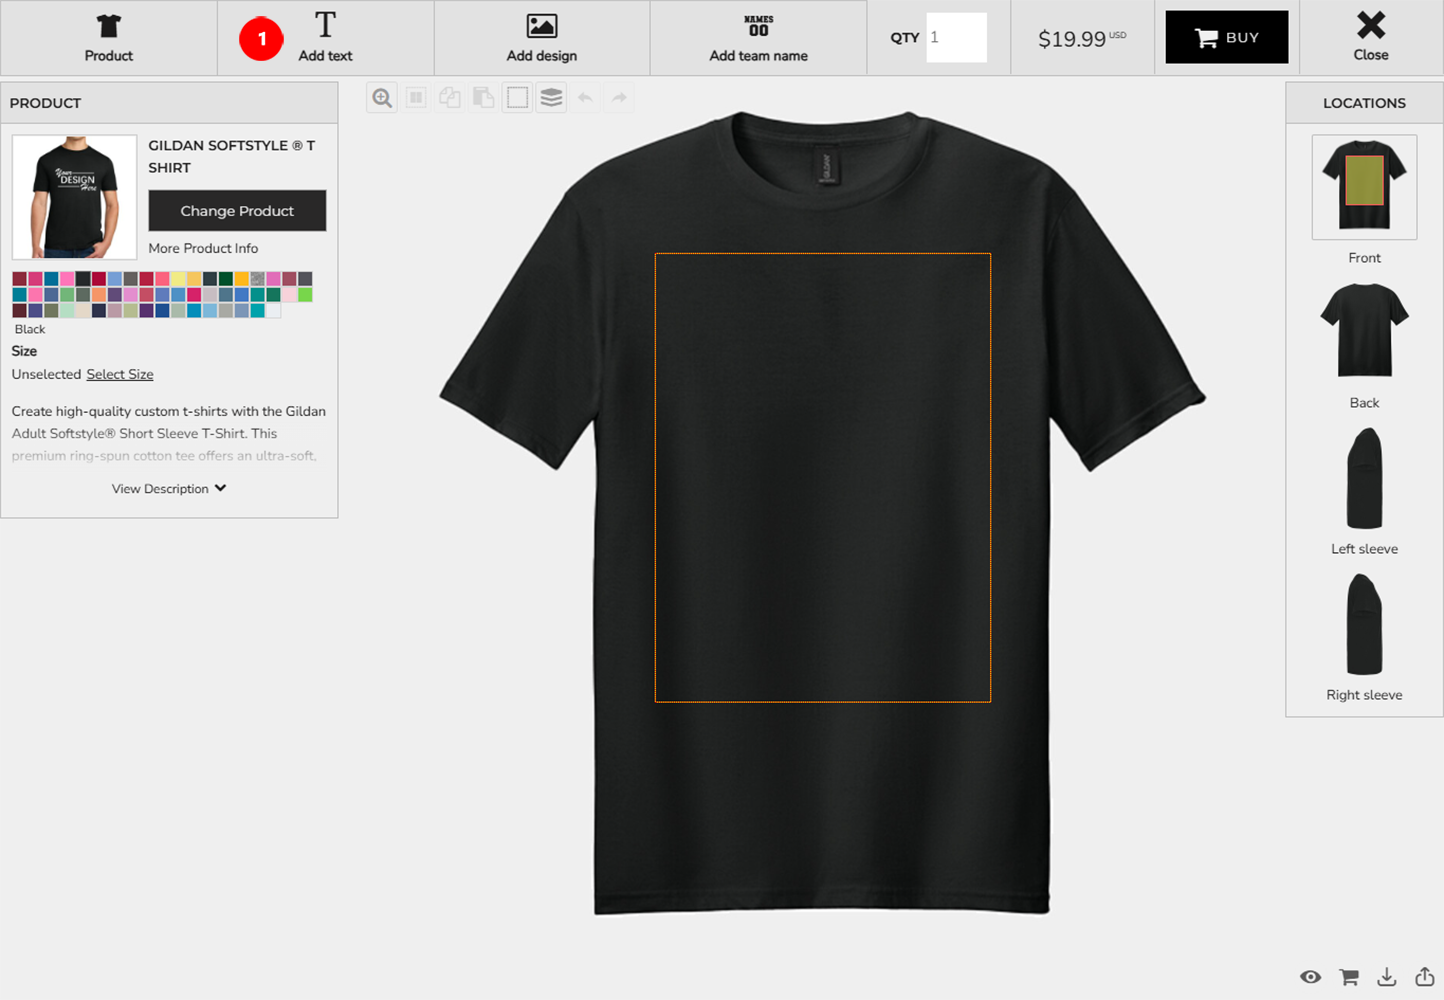
Adding Text
Step 1: Open the Text Tool
On the top of the Design Studio, toward the left side (second option), click Add Text. The Select Type of Text window will open.
Step 2: Select the Type of Text
You will see two options: Add Embroidery Text and Add Printing Text. Not all items allow both options. If one is unavailable, it will be grayed out with a note explaining why.

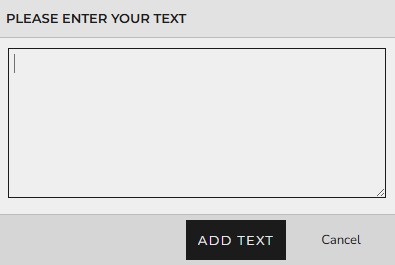
Step 3: Enter Your Text
After selecting the type of text, the Please Enter Your Text window will appear. Type your text into the white box, then click Add Text.
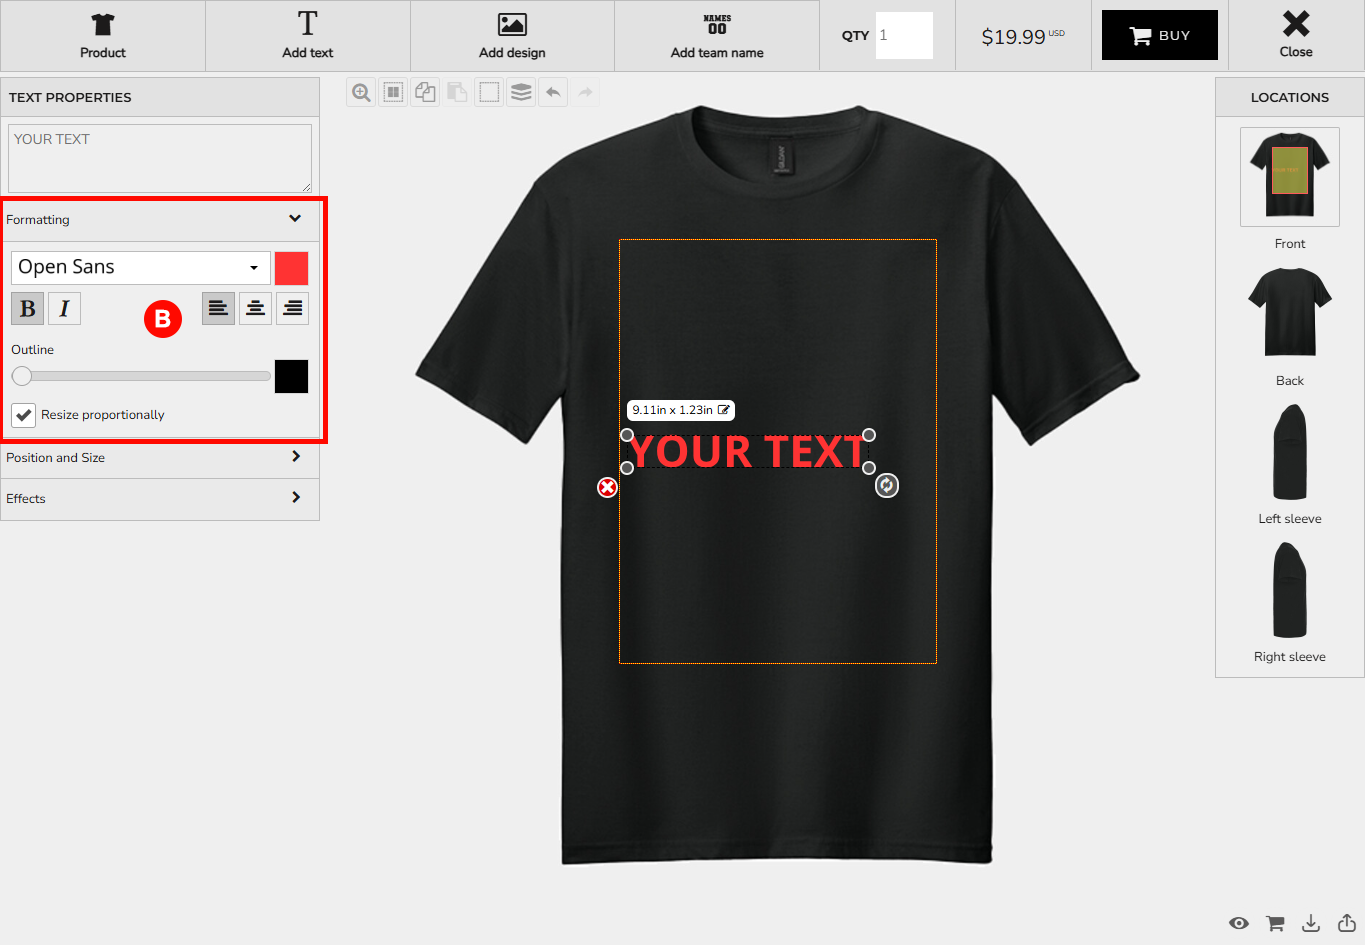
Step 4: Edit Text Properties
Once added, your text will appear on the item. On the right-hand side, the Text Properties panel will open:
Step 4a: Basic Text Editing
Edit your text directly in the first section of Text Properties.

Step 4b: Formatting
Change the font, color, bold/italic style, alignment (for multi-line text), add outlines, and toggle proportional resizing.
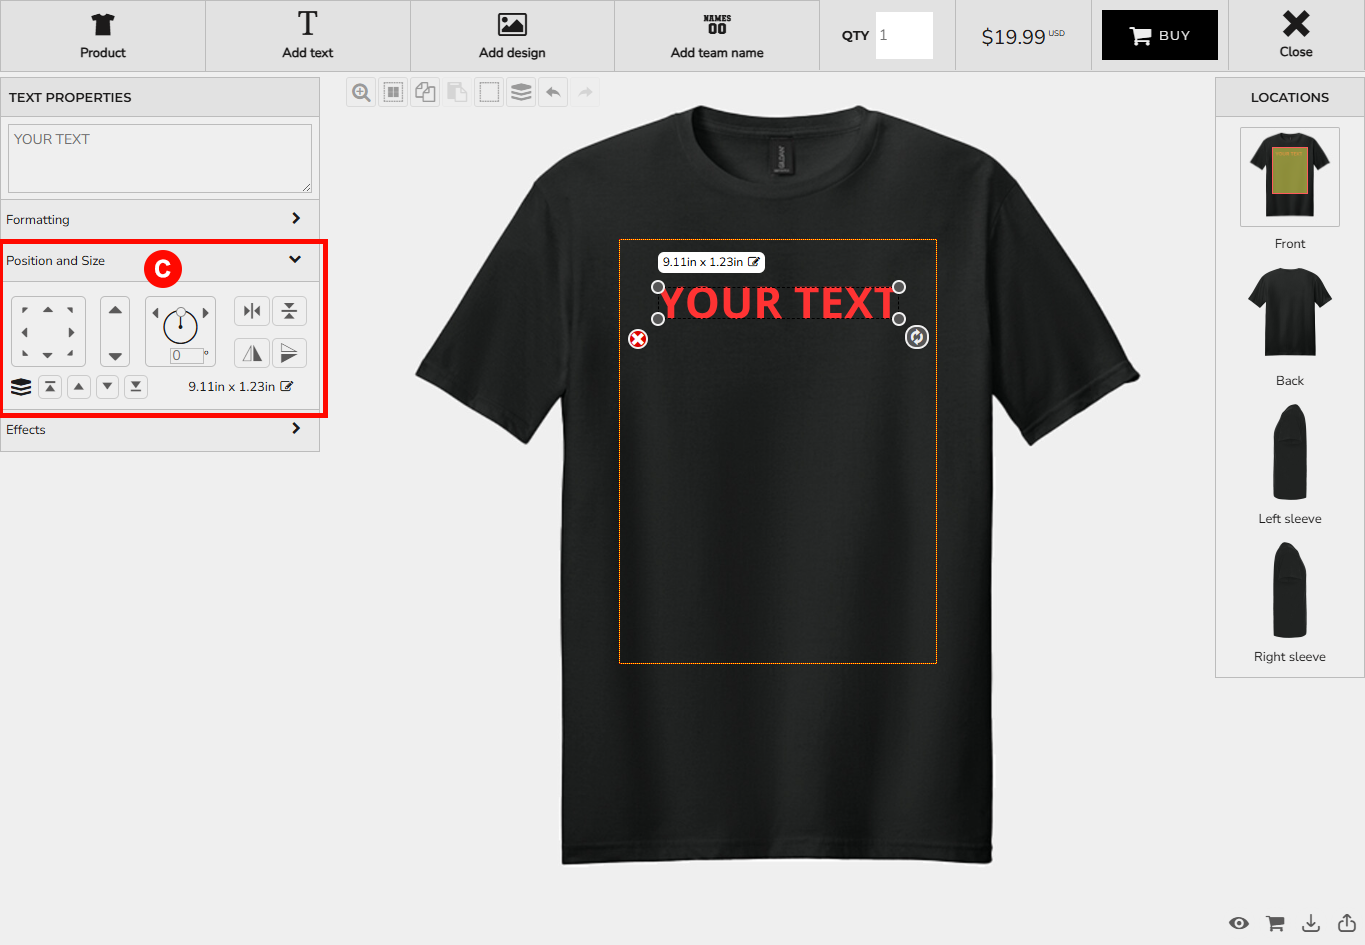
Step 4c: Position and Size
Move, resize, rotate, or precisely position text. You can also adjust the layer order if multiple elements exist.
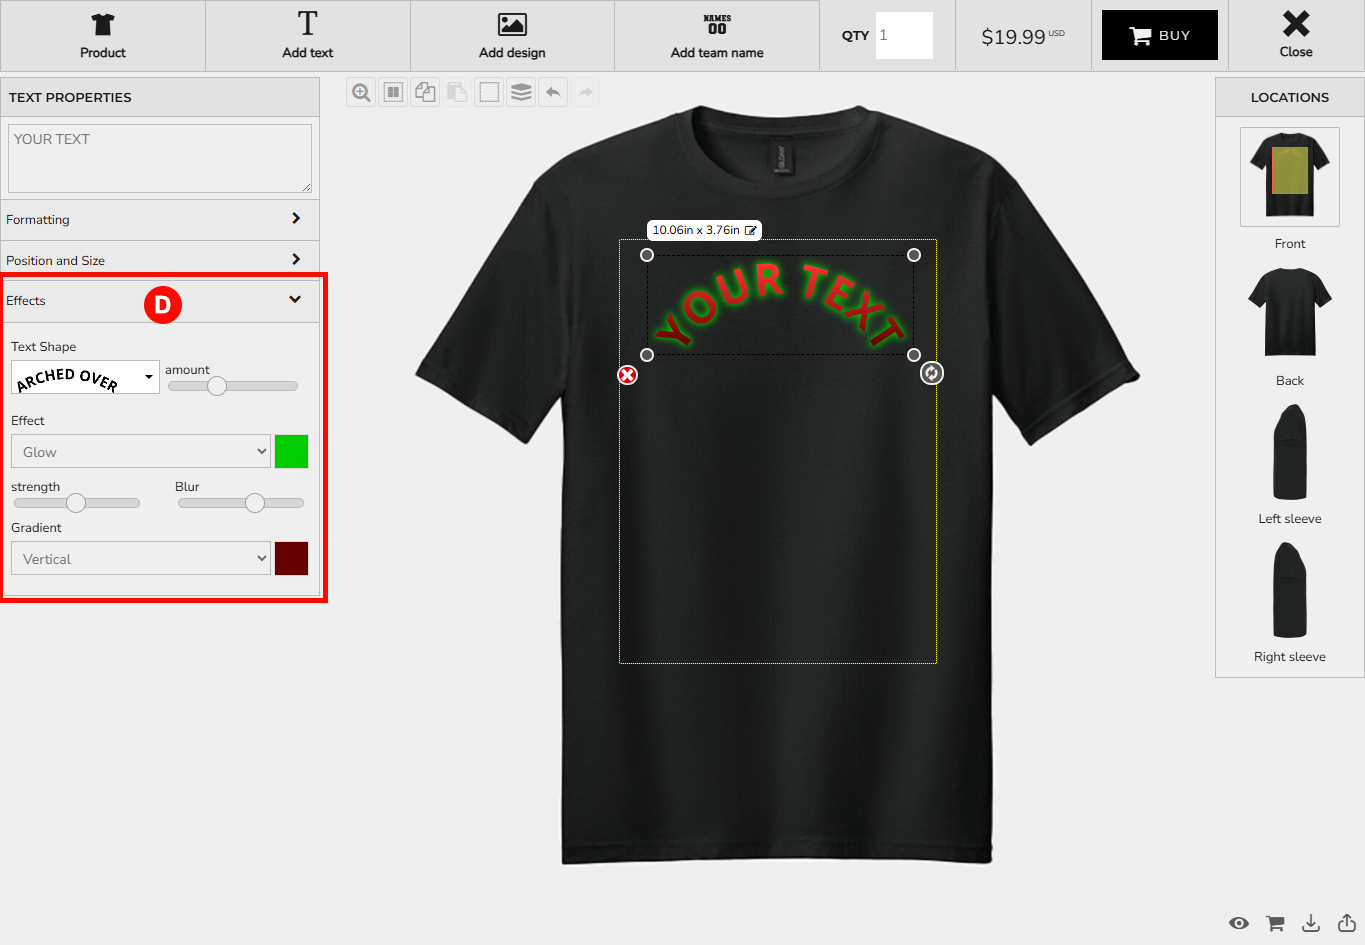
Step 4d: Effects
Apply text effects such as shape adjustments, shadows, glow, or gradients (horizontal/vertical).
Notes: Adding text is optional. Some effects or formatting options may not be available for certain items.