Uploading Image (Optional)
Step 1: Open the Design Window
On the top of the Design Studio, toward the left side (third option), click Add Design. The Select Type of Design window will appear.

Step 2: Choose the Type of Design
You will see two options: Add Embroidery Design and Add Printing Design. Not all items allow both options. If an option is unavailable, it will be grayed out and display a note.

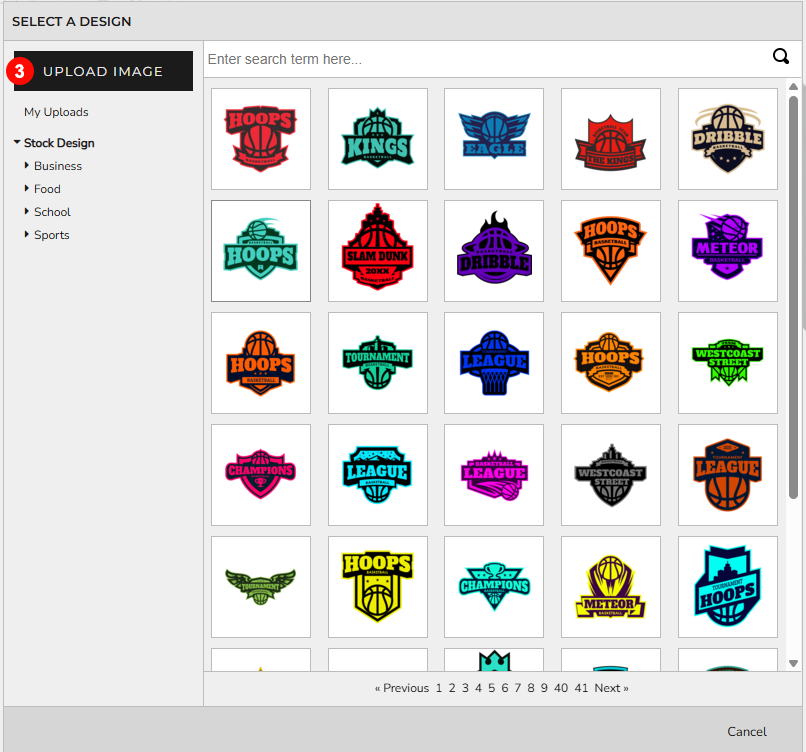
Step 3: Select or Upload Your Image
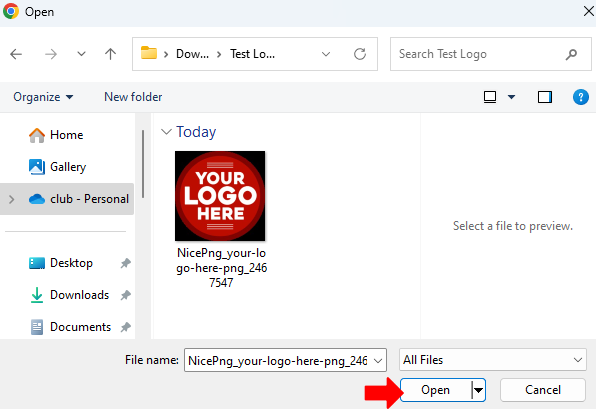
After selecting the design type, the Select a Design window appears. Click Upload Image and locate your image in the window that appears. Highlight/select the image and click Open.
If you want to use a previously uploaded image, click My Uploads instead, located right under the Upload Image button.
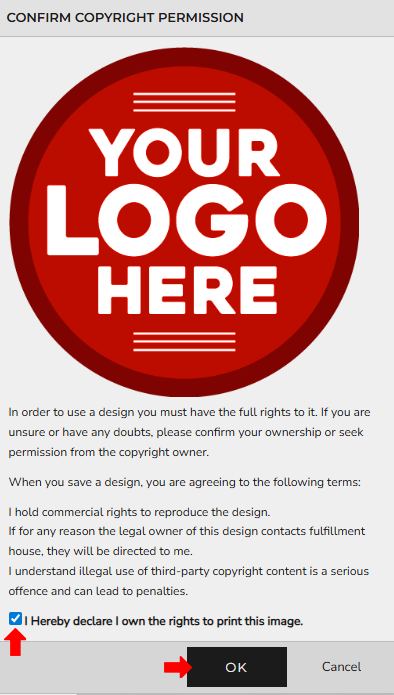
Step 4: Confirm Copyright Permission
After clicking Open, the Confirm Copyright Permission window will appear. Read the terms, check the box next to “I Hereby declare I own the rights to print this image,” and click OK. Your image will appear on the item.
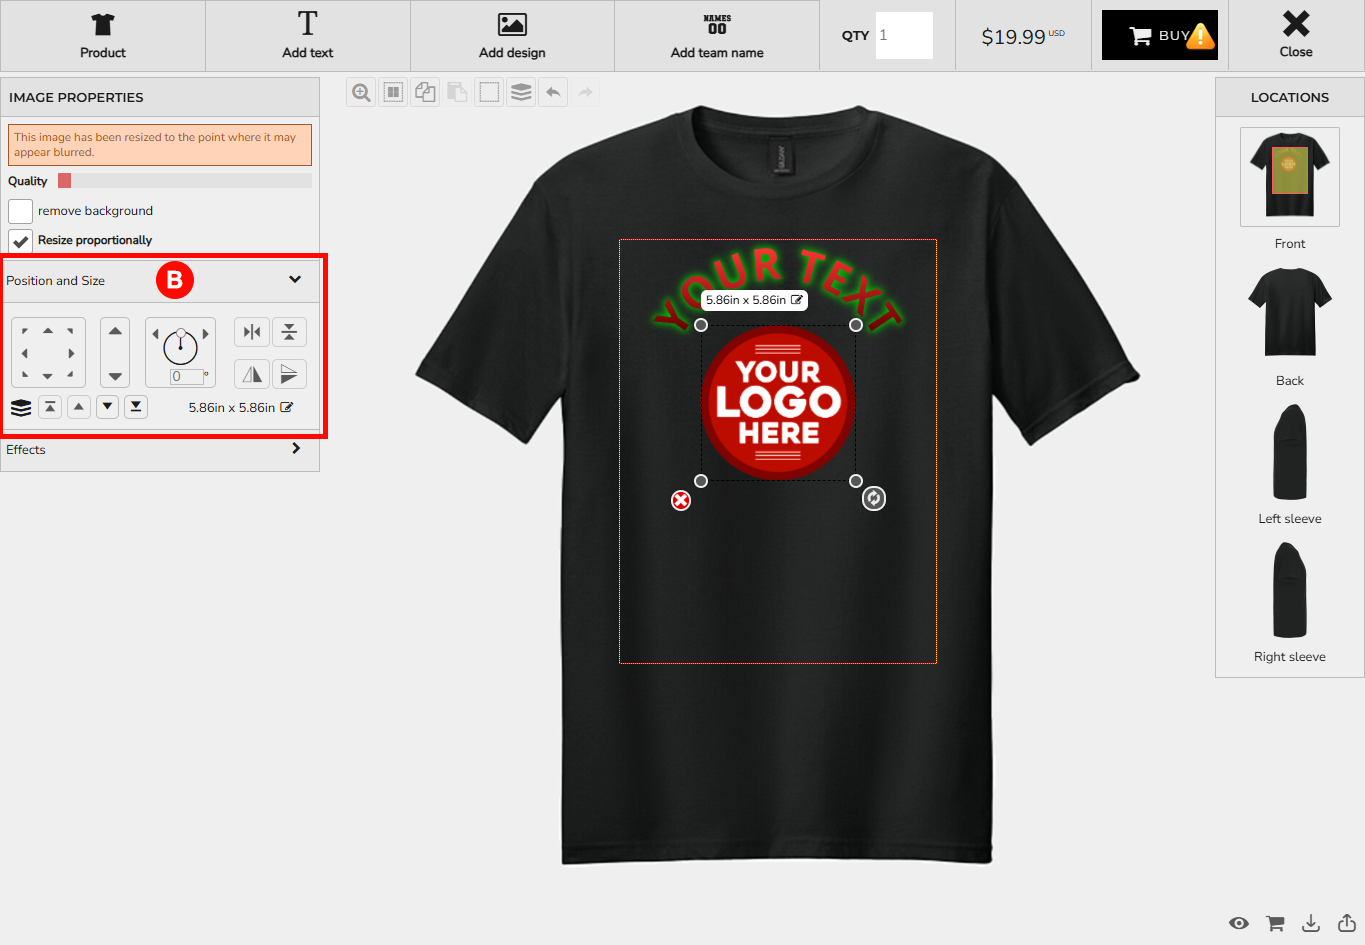
Step 5: Modify Image Properties
On the right-hand side of the Design Studio, you will see Image Properties divided into three sections:
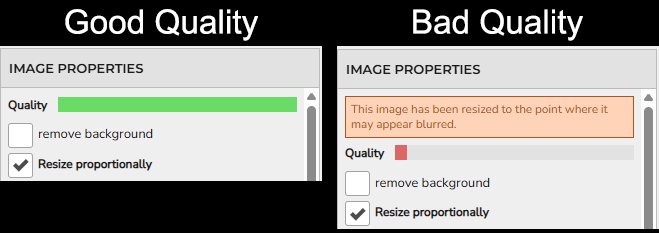
A. Quality Meter
The meter shows if your image is Good (green) or Bad (red). Below it are options to remove background and resize proportionally.

B. Position and Size
Move, resize, rotate, center horizontally/vertically, adjust layer order, or enter measurements in inches.
C. Effects
Add visual effects: change shape, shadow, glow, horizontal/vertical gradient.

Notes: Uploading an image is optional. Some effects or formatting options may not be available for certain items.